Using the Notebook Present extension#
The AEN Notebook Present extension turns your notebook into a Microsoft PowerPoint-style presentation.
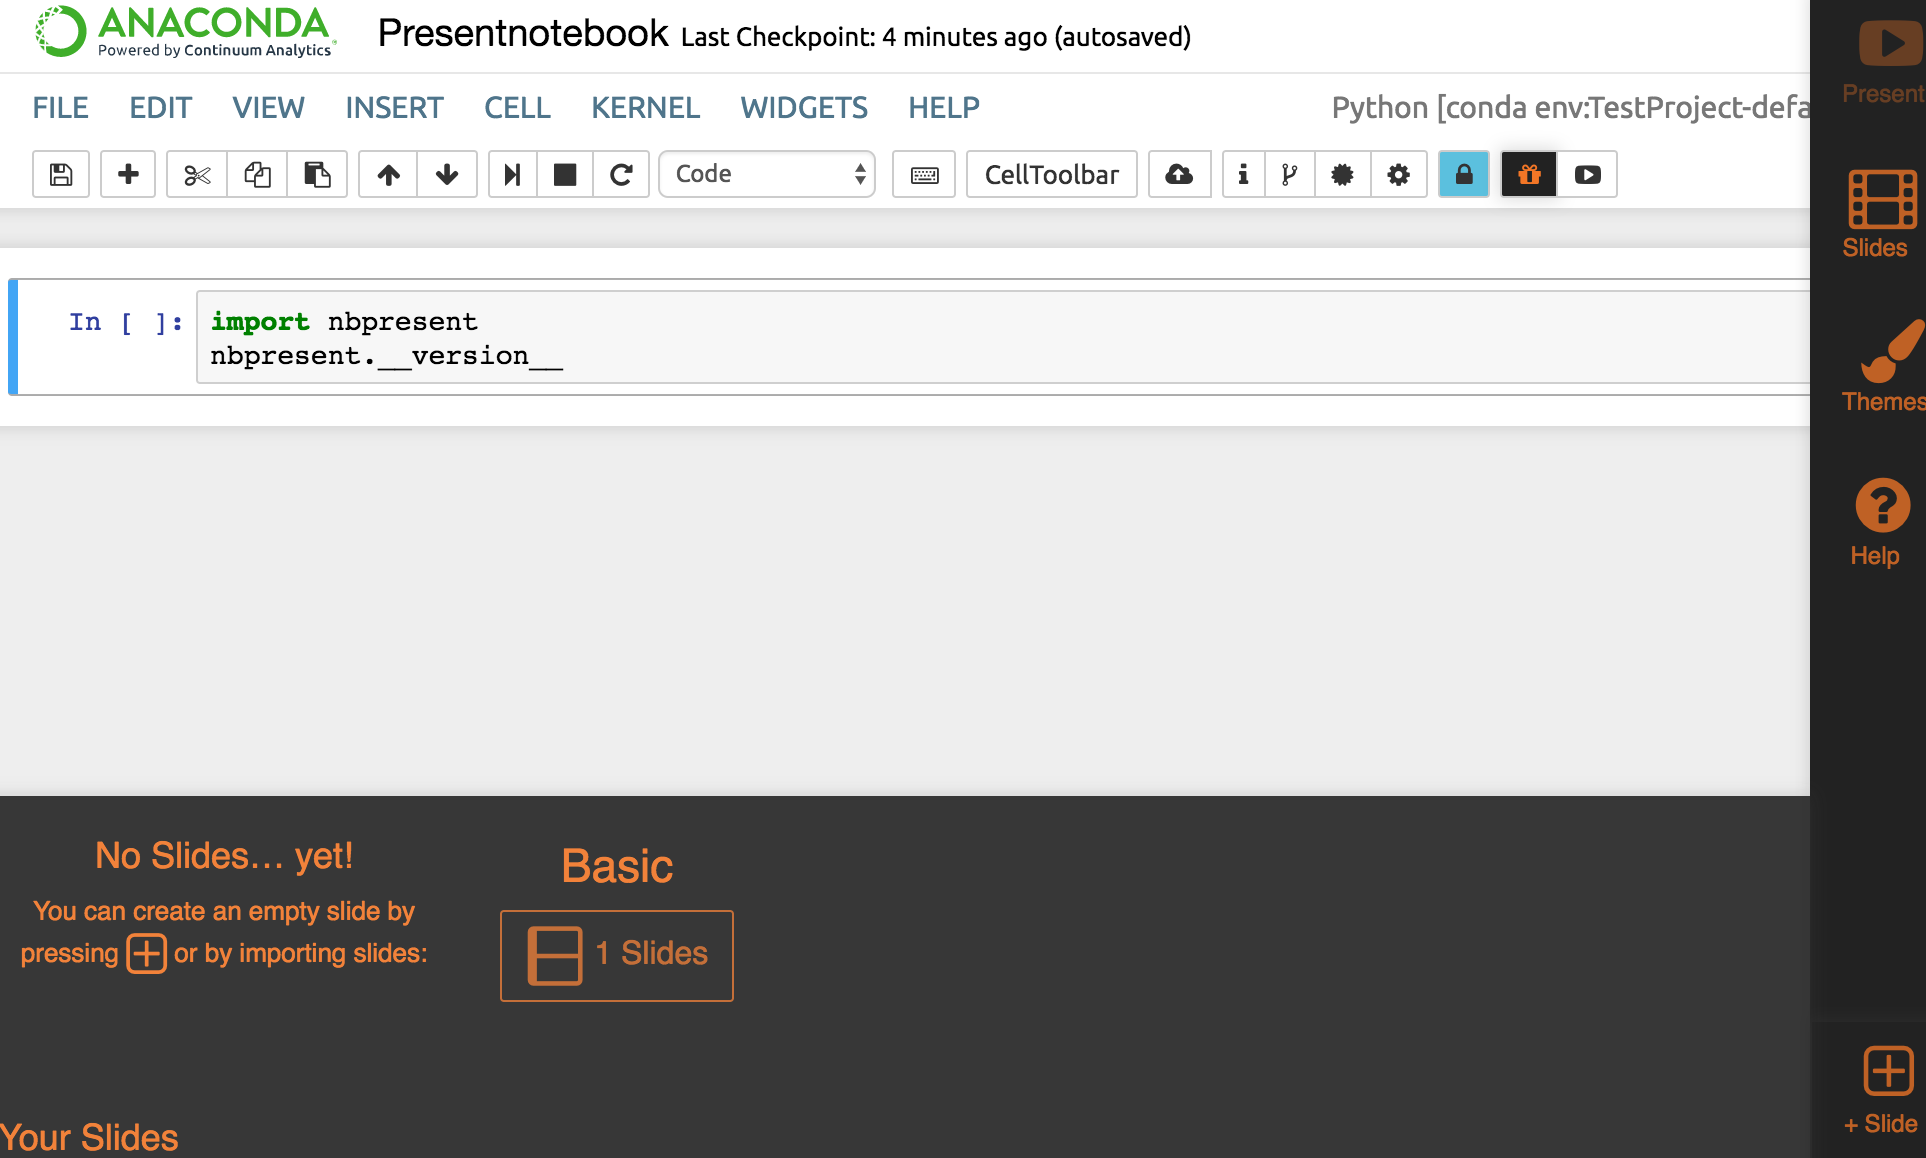
The Present extension adds 2 buttons to Notebook’s menu bar—Edit Presentation and Show Presentation:

To begin using Notebook Present, click the Edit Presentation button.

The Notebook Present sidebar is displayed on the right side of your browser:
Clicking each icon changes the menu and layout of your notebook.
Clicking the Help icon displays 3 tours—demonstrations—of the main features of Present:
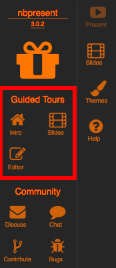
Select one of the tours to view a short presentation regarding the specifics of that feature.
Intro tour#
The Intro tour is a 2-minute presentation that explains how to use the main features of Present, including a description of each button’s purpose.
NOTE: At any time, you can pause, go back to the previous or move forward to the next slide.
The following information is covered in the Intro tour:
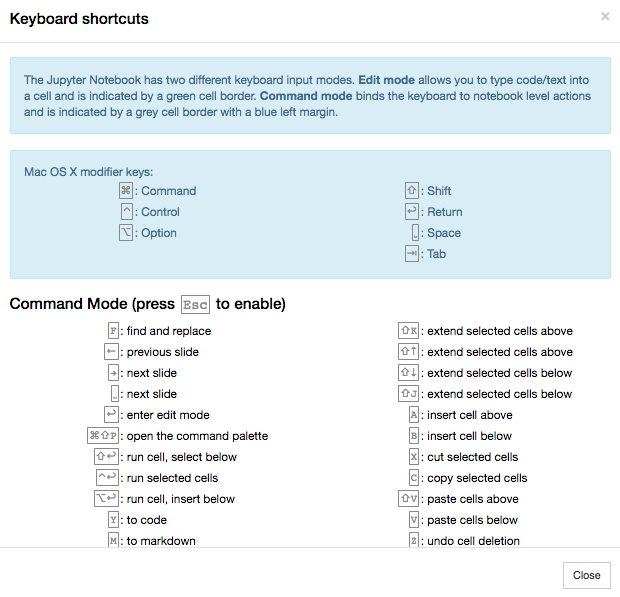
App Bar—When Authoring, this allows you control the content and style of your presentation. It also can be used to activate several keyboard shortcuts for editing:
Stop Authoring—Clicking the Edit Presentation button again stops Authoring, and removes all keyboard shortcuts.
Show Presentation—If you just want to run your presentation without using any Authoring tools, just click the Show Presentation button.
Presenting/Authoring—Once you’ve made some slides, start Presenting, where you can use most Notebook functions with the Theme we have defined, as well as customize slides on the fly.
Slides button—Slides, made of Regions linked to Cell Parts are the bread and butter of any presentation, and can be imported, created, linked, reordered, and edited here.
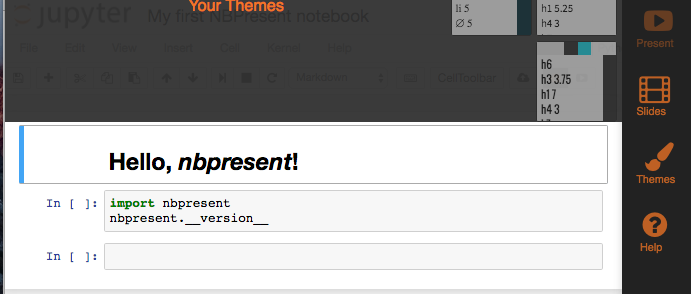
Theming—Theming lets you select from existing colors, typography, and backgrounds to make distinctive presentations. The first theme you select will become the default, while you can choose custom themes for a particular slide, like a title.
Saving—Whenever you save your Notebook, all your presentation data will be stored right in the Notebook .ipynb file.
Downloading—After you’ve made a presentation, you can download it as an HTML page by choosing Download → Download As: Presentation (.html) in the menu.
Help—Activate Help at any time to try other tours, connect with the Present developers and community, and other information.
Slides tour#
Slides make up a presentation. Clicking Slides toggles the sorter view and the Slide Toolbar on and off:

The Slides tour explains how to create and manage slides, including the following information:
Slide Toolbar—Create a new slide. Clicking + Slide will offer some choices for creating your new slide.
Import—The quickest way to create a presentation is to import each cell as a slide. If you’ve already created slides with the official slideshow cell toolbar or RISE, you can import most of that content.
Template Library—You can create a presentation from an existing template.
Reuse Slide as Template—You can create a presentation based on an existing slide.
Simple Template—A common template is the Quad Chart, with four pieces of content arranged in a grid.
Region—The Quad Chart has four Regions. To select a region, click it.
Link a Region to a Cell Part—Each Region can be linked to a single Cell Part using the Link Overlay, which shows all of the parts available.
Cell Part: Source (blue)–Source, such as code and Markdown text.
Cell Part: Outputs (red)–Outputs, such as rich figures and script results.
Cell Part: Widgets (purple)–Jupyter widgets, interactive widgets that provide both visualization and user input.
Cell Part: Whole (orange)–Finally, a Whole Cell, including its Source, Widgets and Outputs can be linked to a single region.
Unlink a region from a Cell Part—Unlinking removes the connection between a region and a cell part, without deleting either one.
Region: Trashing—Trashing a Region permanently deletes it, without affecting any linked Cell Part.
Part Thumbnail—We’ll try to draw a part thumbnail. It can only be reliably updated when a linked Cell Part is on-screen when you mouse over it, but you should usually be able to get an idea of what you’re seeing. The colors of the regions correspond to the cell types.
Presenting—Clicking the Present button while editing brings up the Presenter with editing mode still enabled:
Linked inputs and widgets are still interactive.
Go forward—Click to go to the next slide
Go back—Click to go back to the previous slide
Go back to the beginning—Click to go back to the first slide
My work is done here—Click to go back to the Notebook.
Editor tour#
Once you’ve made a few slides, you’ll likely want to customize them. The Editor tour explains how to edit your notebook, including the following information:
Editing Slides—Activate the Slide Editor by double-clicking it, or by clicking Edit Slide.
Region Editor—Click to drag Regions around and resize them.
Region Tree—Reorder Regions and see the details of how Regions will show their linked Parts.
Add Region—Add new regions.
Attribute Editor—Edit the properties of a region.
Data Layouts—In addition to manually moving regions, you can apply these layouts to automatically fill your slides.
More Regions—Add more regions—with a weight of 1.
Tree Weight—Make a Region bigger or smaller, based on its relative weight.
12 Grid—A compromise between the Free and Treemap layouts, the 12 Grid option rounds all of the values in a layout to a factor of 12.